When Shaun Spalding approached me to write a guest blog article I knew I wanted to do something at an intermediate level to help those who have got the basics down and understand how GML works.
So in this post I’m going to showcase surfaces in GameMaker as it is one of the many features I feel doesn’t get the attention it should. For the last few months I have been obsessing over using surfaces and how they can be used to do masking, lighting, outlines, shadows, and countless other powerful graphical features.
We will be learning how to do 3 room transitions starting off easy and each one just getting a tiny bit more complex. In this article we will learn how to do the first transition and there will be a follow up article showing you how to make the other two transitions. Now I’m sure you are already thinking “there are loads of guides for doing screen transition what are so special about these ones?” Well these screen transitions look like you can see two rooms at the same time.

Not only does that final transition look like you can see two rooms at the same time, but the second room looks like it has been broken up and brought on in chunks and put back together. However this is just an illusion and is actually just many images that have been put together to look like this.
This seems like a good place to say that I will be providing a GameMaker project file so you can see it working in full if you download that and you can grab any code you need or make changes and have a tinker. You can even use it to have a preview of how the other two transitions will work.
If you haven’t used surfaces before they are basically an empty canvas you can draw onto in the same way you draw any sprite onto the screen and anything you draw there is saved, these surfaces can then themselves be drawn onto the screen with everything you have added onto them.
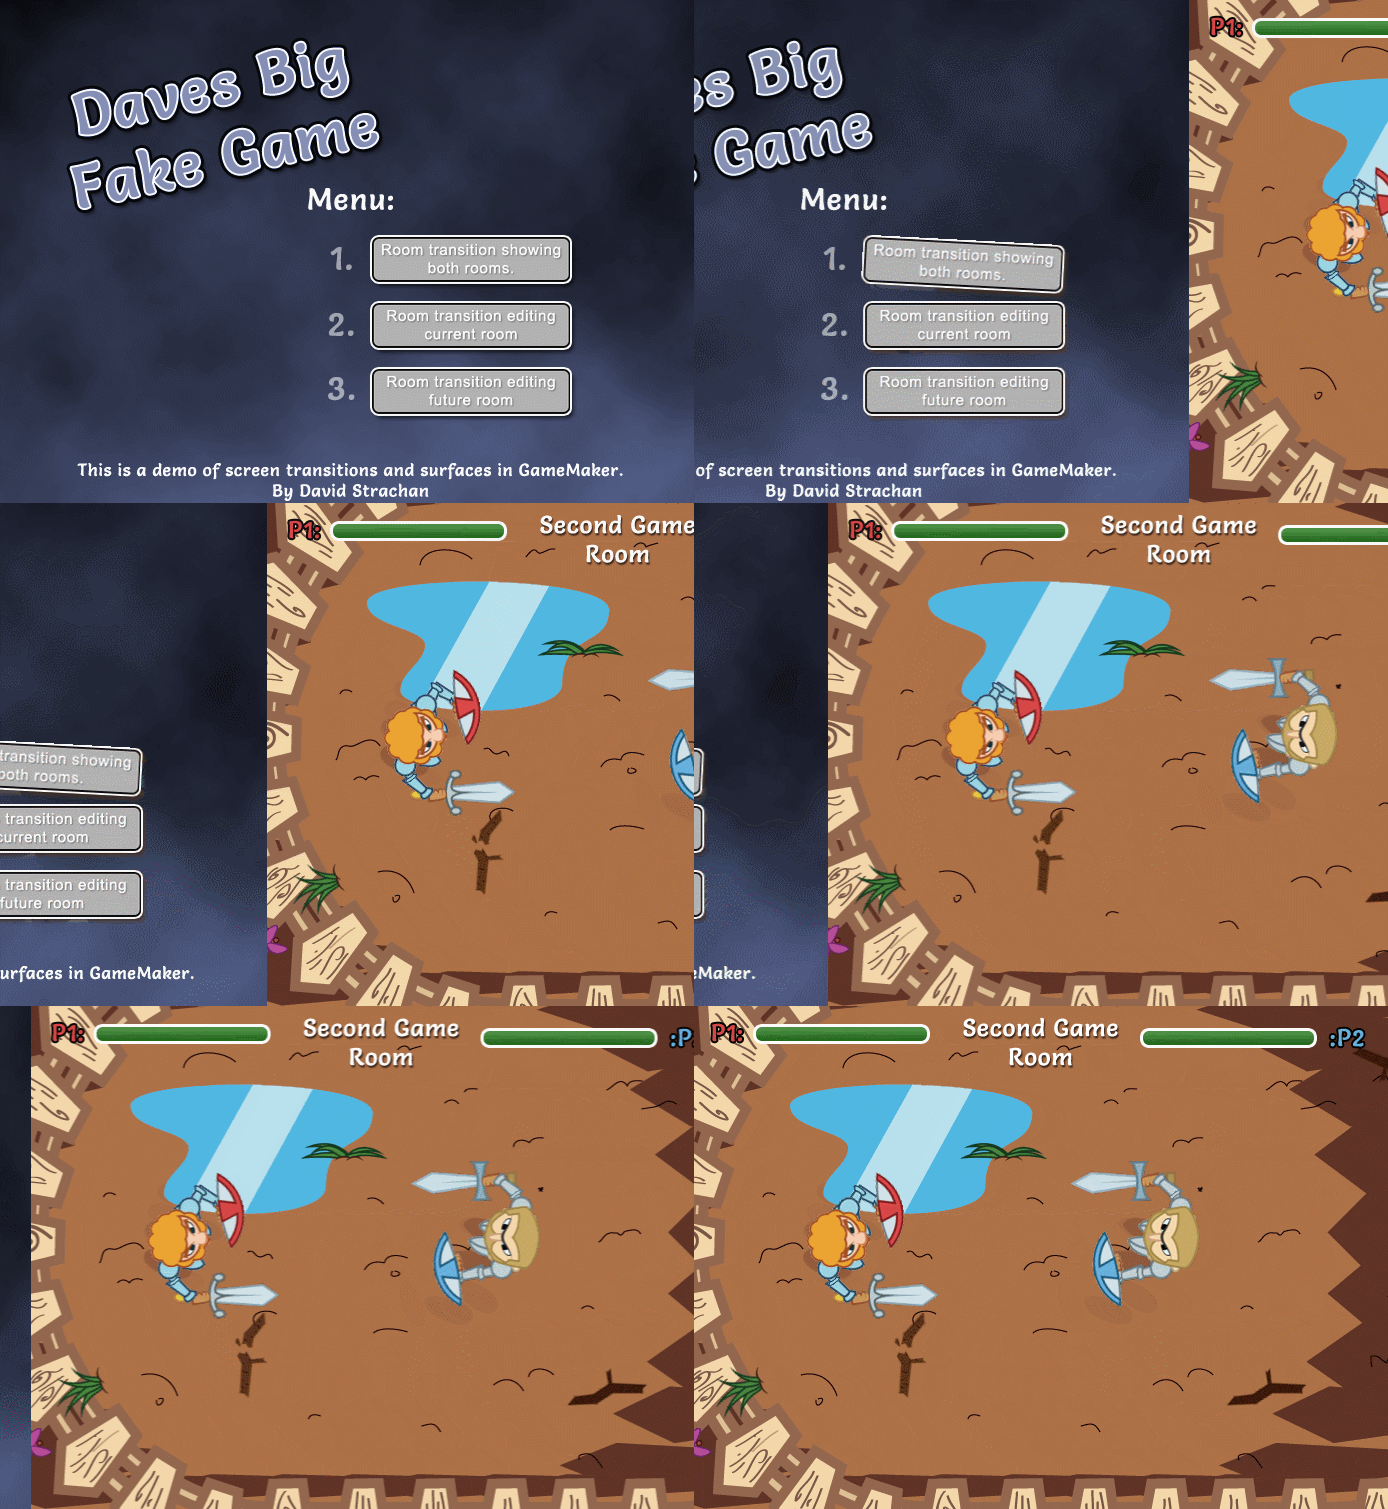
In this article I will show you how to capture images of the current state of the screen and the basic method we will be using to trigger the transition and keep track of how far along the transition is. We will do this with a sliding transition:
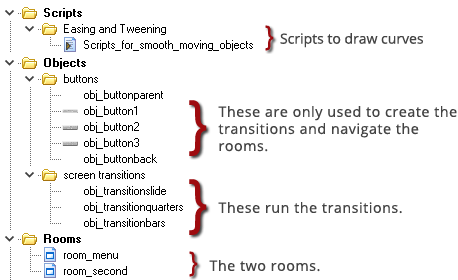
The project consists of two rooms and 8 objects:
- 3 of these objects are the buttons that create the transition
- 1 is a master parent button
- 1 is a back button
so we can ignore all of those. The 3 objects we are interested in are:
- obj_transitionslide
- obj_transitionquarters
- obj_transitionbars
When these objects are created the transition will start.
This simple, yet stylish transition can be adapted for users on mobile devices that want to be able to flick the screen across to change the room and have the room move 1 to 1 with the player’s finger.
currentframe = 0
maxframes = 45

persistent = true; // when changing room keep this object alive

// copy the old room so we can display it on the second room
sur_oldroom = surface_create(room_width,room_height);
surface_copy(sur_oldroom,0,0,application_surface)

// We have recorded what the old room looks like so we can instantly go to the next room.
room_goto(room_second)
currentframe and maxframes – Used to record how long the transition lasts and how far through it we are. If you want to make any of these transitions last longer just make maxframes a larger number.
persistent – This tells GameMaker that when we change the room we do not want this object to be destroyed.
surface_create() – We use surface_create() to make a variable to store the surface.
surface_copy() – This is used to duplicate a surface. The clever bit here is it duplicates application_surface which already contains an image of how the screen currently looks.
Together surface_create(), surface_copy() and application_surface basically take a screenshot of the game.
Side note: Depending on your game you might want to use maxframes=room_speed*1.5 this would allow you to detach the length of the transition from the room speed and use a more absolute timing system. Also you will have to remember not to move anything or start any animations on the next room until the transition has finished.
currentframe++

if (currentframe > maxframes) {
    instance_destroy() // The transition has finished so destroy it
}


// We are now on the second room so record that room.
if (currentframe == 2) {
    sur_newroom = surface_create(room_width,room_height);
    surface_copy(sur_newroom,0,0,application_surface)
}
The step event does two things; If the transition has finished it destroys the object, and on the second frame it records what the new room looks like just like we recorded the first room. At this point, we have stored in sur_oldroom an image of the old room and in sur_newroom an image of the new room.
if (currentframe > 1) {

    // convert the number of frames that have passed into a number between 0 and the room width
    var slideamount = EaseOutQuad(currentframe,0,room_width,maxframes)

    if (surface_exists(sur_oldroom)) {
        draw_surface(sur_oldroom,-slideamount,0)
    }

    if (surface_exists(sur_newroom)) {
        draw_surface(sur_newroom,room_width-slideamount,0)
    }
}


/// I do this to hide the flicker where the next room pops up for 1 frame
if (currentframe == 1) {
    if (surface_exists(sur_oldroom)) {
        draw_surface(sur_oldroom,0,0)
    }
}
We use EaseOutQuad() to create a number between 0 and room_width that gets bigger the more frames that have passed, we then draw the two surfaces next to each other and offset them by this number to make it look like they are both sliding simultaneously.
All of that code is pretty intuitive apart from that little chunk at the end. The reason we want to flash up an image of the old room for one frame is because if we didn’t there would be a flicker when changing room. This happens because we would normally need to display the new room for one frame so we could take an image of it, however recording the application_surface in the step event allows us to record what the room should look like and then overwrite this by drawing in the draw_gui event. *shrugs* I don’t know why, it just works.
surface_free(sur_newroom)
surface_free(sur_oldroom)
So last thing to do is tidy up when we are done with the transition.
I think I better mention the 3 tabbed scripts I have also used. I have written a guide on doing easing in GameMaker but the short story is they do some very basic maths that allows you to do some very clever things. Basically these scripts help you to draw graph curves. It does this by providing an input range and an output range, it will then transform where a point on the input range would fall between the output range. It actually goes further than that because that would be a linear conversion, these also converts points that do not have even gaps between them. You don’t have to use them but that’s what makes the images look like they smoothly glide along and slide to a halt.
From this you should have learnt how to record an image of the whole screen and move this information into another room.
You will have noticed that every time I drew the surface to the screen I first tested to made sure it existed. This is very important because these surfaces can be volatile and removed from the memory without notice.
If you are interested in getting some inspiration for other transitions between rooms I have started collecting some you can use here: http://www.davetech.co.uk/screentransitions
I have other guides for GameMaker on my website: www.davetech.co.uk and I also post other game dev things I do on my twitter: @DavesInHisPants
Thanks for reading, Look out for the next article!
Go forth and code, David Strachan
Welcome back! This is the second part of my guide on surfaces where we will be making some screen transitions together. If you didn’t catch the first part where I go through the initial steps you can find it here: !!!LINK!!!
I do recommend you read the last post, not just because I wrote it, but to help you get up to speed.
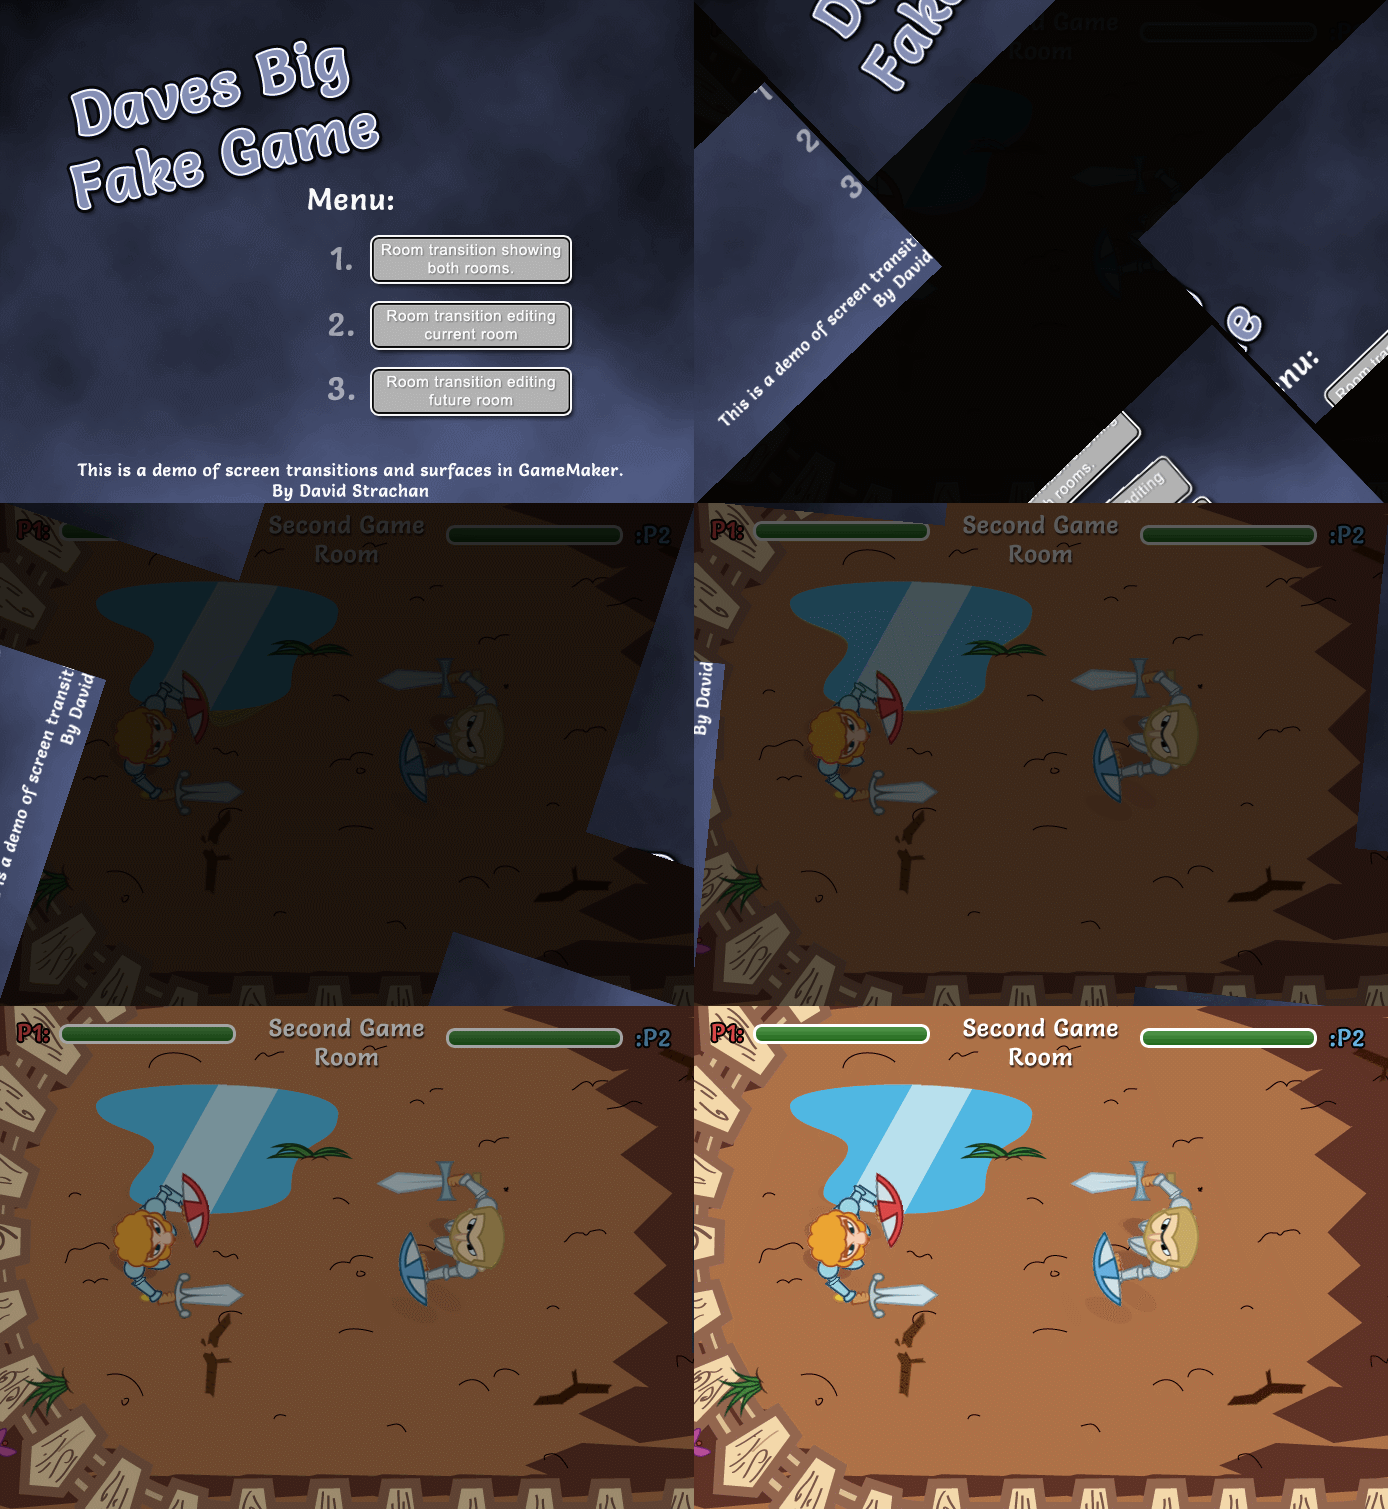
These are the transitions we will be making:

The reason we are using surfaces to do this is because we can make it look like two rooms are being displayed at the same time. Surfaces are basically a blank canvas we can draw onto and anything we draw there is saved. We can then access it just like a variable and draw it to the screen just like a sprite.
I have provided a gmz project file so you can download it and see all the code for yourself and hopefully this will help you integrate these kinds of transitions into your games and assist you in learning how to use surfaces in GameMaker.
LINK TO THE GMZ FILE
Lets look at the second transition we will be making. For this one I will not be going over what we did in the first transition but going over the changes that make them different.
var halfheight = surface_get_height(application_surface)/2
var halfwidth = surface_get_width(application_surface)/2

spr_roomtl = sprite_create_from_surface(application_surface, 0,            0,          halfwidth, halfheight, false, false, 0,         0);
spr_roomtr = sprite_create_from_surface(application_surface, halfwidth ,   0,          halfwidth, halfheight, false, false, halfwidth, 0);
spr_roombl = sprite_create_from_surface(application_surface, halfwidth ,   halfheight, halfwidth, halfheight, false, false, halfwidth, halfheight);
spr_roombr = sprite_create_from_surface(application_surface, 0,            halfheight, halfwidth, halfheight, false, false, 0,         halfheight);

room_goto(room_second) // We have recorded what the old room looks like so we can instantly go to the next room.
In the same way that we made the single image of the room in the first transition, here we are creating 4 images each taking up a different quarter of the screen and each with a separate origin.
The reason I am turning this straight into a sprite is because we can give each quarter a different origin to rotate around.
/// For the transition

if (currentframe > 0) {

    // draw a fade under everything
    draw_set_colour(c_black)
    draw_set_alpha(1-EaseInQuad(currentframe,0,1,maxframes))
    draw_rectangle(0,0,room_width,room_height,false)
    draw_set_alpha(1)

    // convert the number of frames that have passed into a number between 0 and 90 for the angle
    var rot = EaseOutCubic(currentframe,0,90,maxframes)

    draw_sprite_ext(spr_roomtl,0,0,         0,          1,1,rot,c_white,1)
    draw_sprite_ext(spr_roomtr,0,room_width,0,          1,1,rot,c_white,1)
    draw_sprite_ext(spr_roombl,0,room_width,room_height,1,1,rot,c_white,1)
    draw_sprite_ext(spr_roombr,0,0,         room_height,1,1,rot,c_white,1)

}
This draw event is separated into two blocks, in the first half I just draw a black rectangle over the whole screen that fades out. On top of this I draw our 4 images with an ever increasing rotation.
Because of the way I set the origins in the create code each image has its origins set in such a way so that the origin is at the furthest point in the image towards the direction it will be located (so the top left image has its origin in the top left and the bottom right image has its origin in the bottom right etc). So when we rotate each image it rotates around its origin and this makes it look like it is pinned to its corner.
That’s all you need for that transition. Remember if you didn’t understand any of it you can always download the project file to have a look at how it works yourself.
Let’s now look at the final transition we have been building up to:
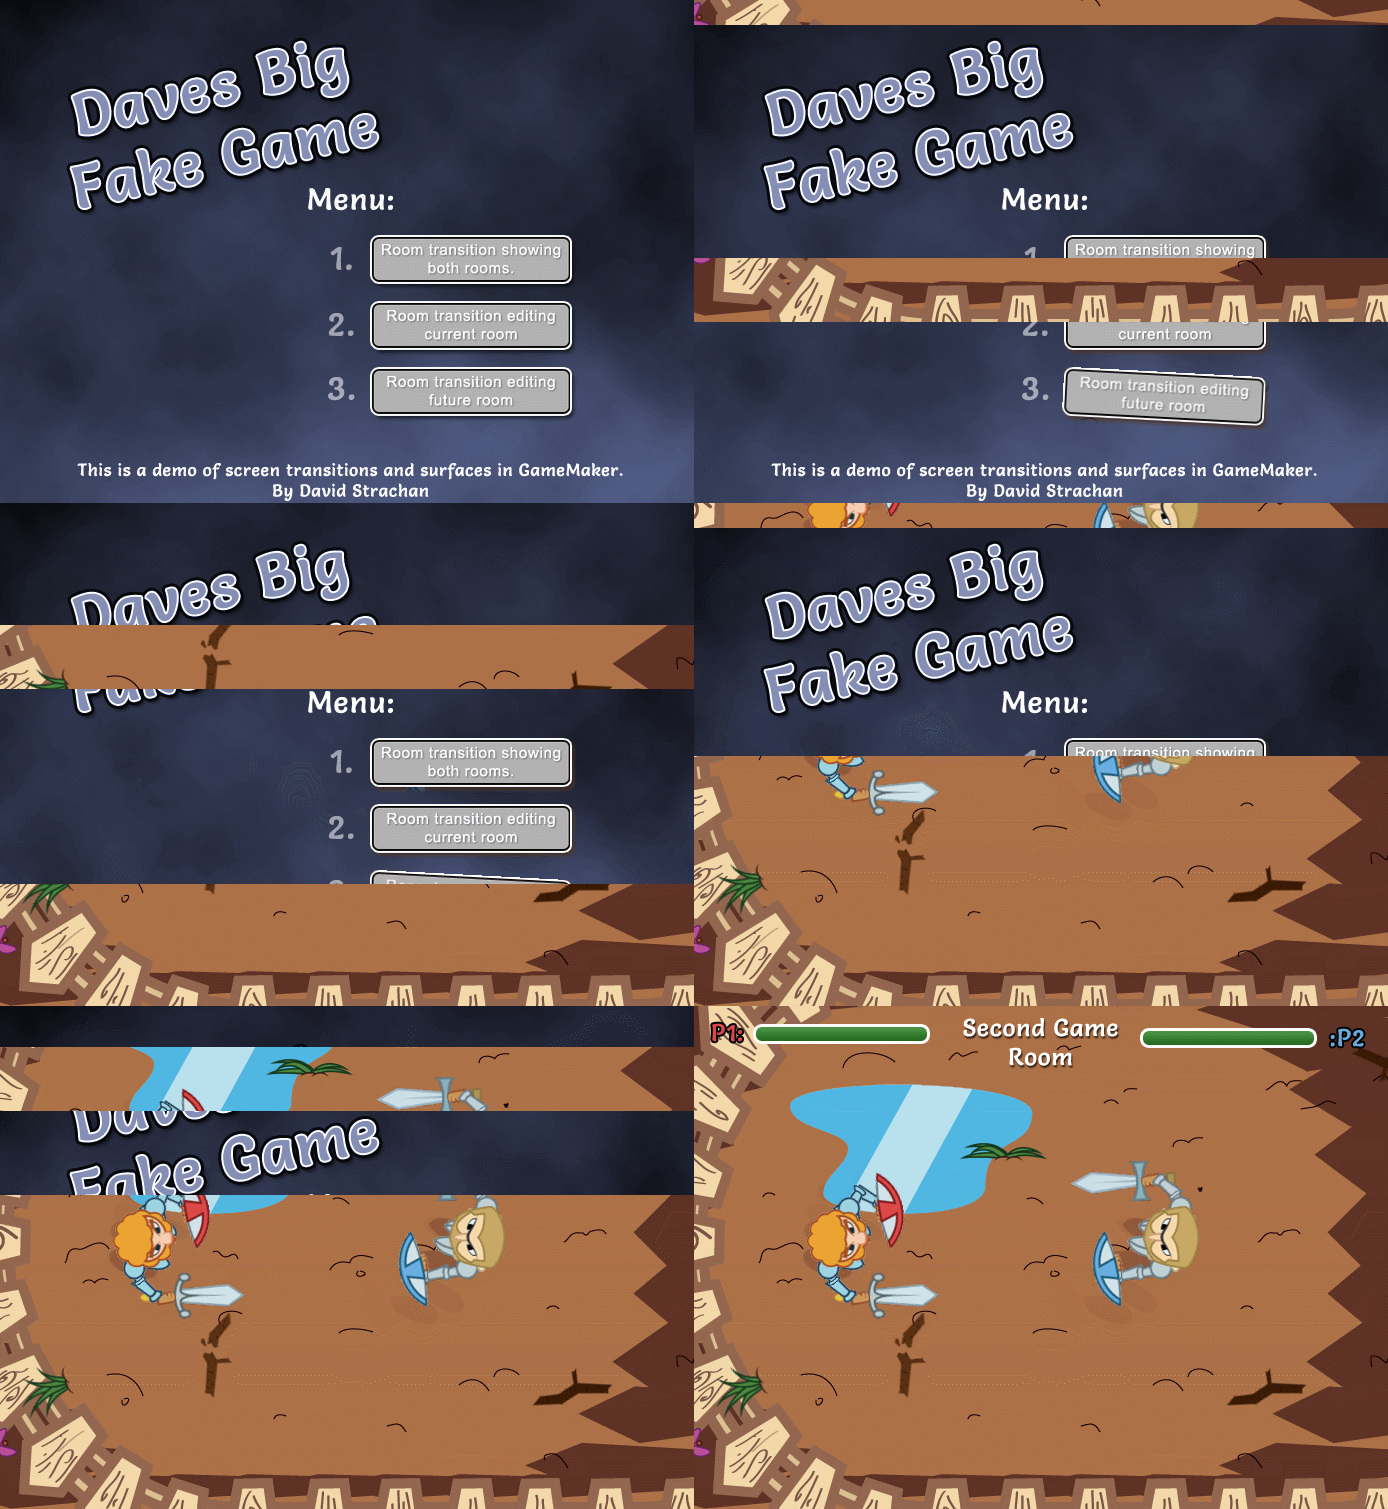
At first glance this effect might look very hard to do where we make it look like the room is slowly being brought on and built up however, we are going to break it down and you will see that actually it is quite a simple effect.
Seeing as this is the final transition I thought I would provide all of the code to save you from having to patch it all together from the other transitions we did:
currentframe = 0
maxframes = 110

persistent = true; // when changing room keep this object alive

numberofbars = 8

// copy the old room so we can start displaying it ontop of the new one
sur_oldroom = surface_create(room_width,room_height);
surface_copy(sur_oldroom,0,0,application_surface)

widthtouse = room_width
heighttouse = surface_get_height(application_surface)/numberofbars

// Here we initialise the variables that will be used to know where to display the falling bars
for (i=0; i<numberofbars; i++) {
    barstopy[i] = (room_height/numberofbars)*i
    bary[i] = -100
    barspeed[i] = 1
    baroffset[i] = maxframes-((maxframes/numberofbars)*i)-15
}

room_goto(room_second) // We have recorded what the old room looks like so we can instantly go to the next room.
I think it is worth reminding everyone here that as soon as the transition object is made it records an image of the screen and then changes the room. It then continues to draw the image of the old room on top of the new room, so to the player it doesn’t look like we are on a new room.
We use surface_create() and surface_copy() to basically take a screenshot of the game.
I also use a loop where we will initialise some arrays that will be used to save information about where we need to draw each of the bars that fall. All of these arrays start with the word bar so it is easy to know which ones they are in the future.
currentframe++

if (currentframe > maxframes) {
    instance_destroy() // The transition has finished so destroy it
}

// We are now on the second room so record that room.
if (currentframe == 2) {
    for (i=0; i<numberofbars; i++) {
        spr_bar[i] = sprite_create_from_surface(application_surface, 0, heighttouse*i, widthtouse, heighttouse, false, false, 0, 0);
    }
}
The step event is doing 3 things;
First it is progressing the counter to tell us how far along the transition is.
Secondly, it checks to see if the transition has finished and if so, it deletes the object.
Lastly, it checks to see if we are on the second frame, if we are on the second frame we know that the room has changed and we need to record the new room.
We go through a loop for each bar we want to save and record the image starting at heighttouse*i this means each loop will step down and record a different part of the screen. We then save all of these individual images into the spr_bar array.
if (currentframe > 1) {

    if (surface_exists(sur_oldroom)) {
        draw_surface(sur_oldroom,0,0)
    }

    for (i=0; i<numberofbars; i++) {
        if (currentframe > baroffset[i]) {
            if (bary[i] < barstopy[i]) {
                bary[i] += barspeed[i]
                barspeed[i] += 2
            } else {
                bary[i] = barstopy[i]
            }
        }
        draw_sprite(spr_bar[i],0,0,bary[i])
    }

}
In the draw event, the first thing we do is draw the old room on top of the new room, this hides the fact we are on the new room already. We are then going to draw the images of the bars we saved in the step event on top of this.
The bars can be in either one of two states; falling or it is at it's destination. We will loop around each bar and work out where it needs to be drawn. If it is falling we also need to increase its speed for future frames.
if (currentframe == 1) {
    if (surface_exists(sur_oldroom)) {
        draw_surface(sur_oldroom,0,0)
    }
}
In the Draw GUI event we quickly flash up the image of the old room as soon as we change from the old room to the new room, this is to allow us to quickly capture what the screen looks like and then hide it from the user. If we don’t do this we will get a slight flicker when changing room.
for (i=0; i<numberofbars; i++) {
    sprite_delete(spr_bar[i])
}

surface_free(sur_oldroom)
The very final thing we need to do is remove all of the images we made when the object is destroyed. This little loop on the destroy event just goes around and removes them from memory.
That’s it! I told you it wasn’t as hard as it looked. With 1 object and less than 50 lines of code we have managed to make what looks like a very complex screen transition to produce.
If you wanted further inspiration for room transitions I have been using GameMaker to collect various screen transitions I see in games and films that you can view to help with your own games: http://www.davetech.co.uk/screentransitions
I have other guides for GameMaker on my website: www.davetech.co.uk and I also post other game dev things I do on my twitter: @DavesInHisPants
Go forth and code, David Strachan
 Code Scratch Card / Scratch-Off Ticket in GameMaker
 Persistent Unlimited Blood in GameMaker